Most of the DC gear in my RV is Victron – the BMS 712, 50 amp solar MPPT controller, and an old Venus to connect to Victron VRM (remote Internet monitoring).
I always wanted a Victron Inverter/Charger but I don’t have the space, location, or weight capacity to mount one, so I settled on a Xantrex XC 3000 Pro.
The Xantrex has worked very well but does not have any sort of remote monitoring.
Except – over time they (Xantrex) have updated it to have CAN bus / RV-C support so in theory it can talk to Victron, and even display live status info and controls on a Victron app or touch screen. The only thing missing is a (big) program to do this trick. I figured I would write one.
Right around the time I started looking to see if I could do that, I discovered that somebody already had!
I stumbled onto this: https://github.com/ScottS45/Xantrex-Rvc-VenusOS
So, what I found was not only was this possible, but Scott has a (mostly) working version already running. I got in touch with Scott and volunteered to do some testing. I found his program incredibly complete and useful, but a some sections he had not 100% finished. I recommended some patches after testing and Scott came through with some quick improvements, mainly on displaying charging information. Thanks Scott!
At the link above, Scott gives instructions on connecting the CAN bus from the Xantrex to a USB converter and to a Raspberry Pi, but I just want to connect it directly to my Cerbo GX. (I just bought a new Cerbo GX to replace the old Venus)
I started with this article by Victron to gain root access to a Cerbo type device. Venus Root Instructions
Then I figured out I just needed to connect 3 wires from an RJ45 to the 20 pin Molex connector that is standard on the Xantrex XC Pro models.
Lets start with the Xantrex Molex Connector.
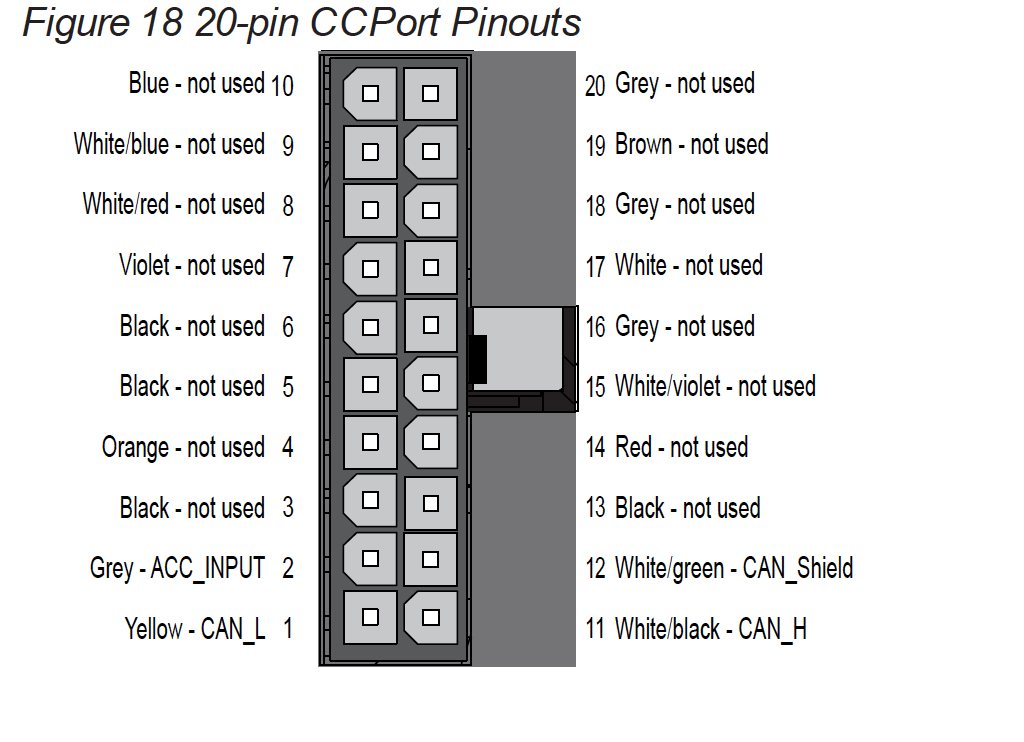
So, we just need to connect 3 wires to the Xantrex:
- 12. CAN ground
- 11. CAN high
- 1. CAN Low
Over on the Cerbo, the CAN ports are RJ45 jacks. So I just took a random network cable laying around, and cut off one end. As far as figuring out how to pin it, lets look at the Victron documentation:
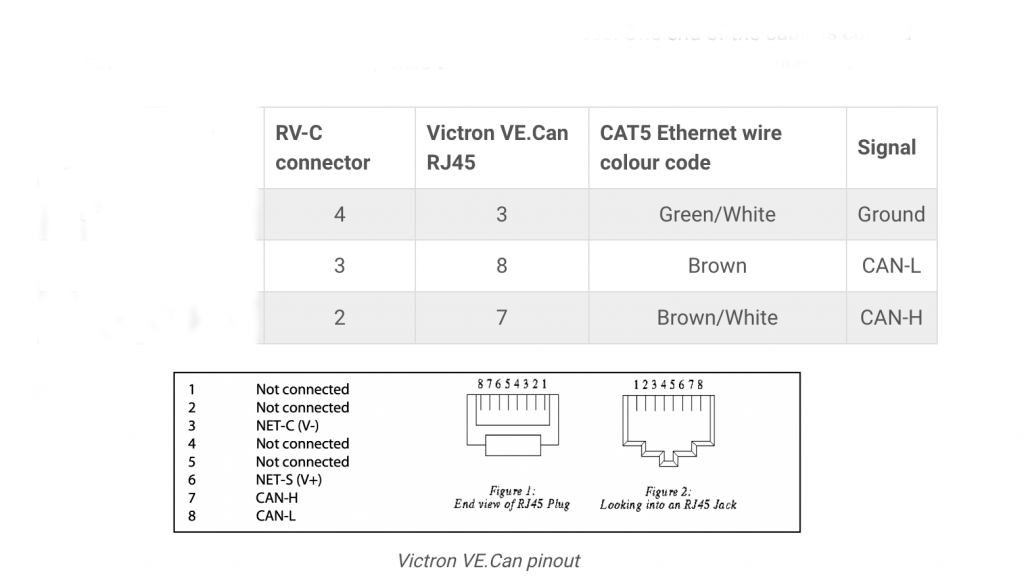
This shows us that we will be using pins 3,8, and 7. Note that the colors listed above were right in my case, but don’t depend on that always being true as there are at least 2 network wiring standards that I know of. So I looked carefully at the RJ45 to verify I had pins 3,8, and 7.
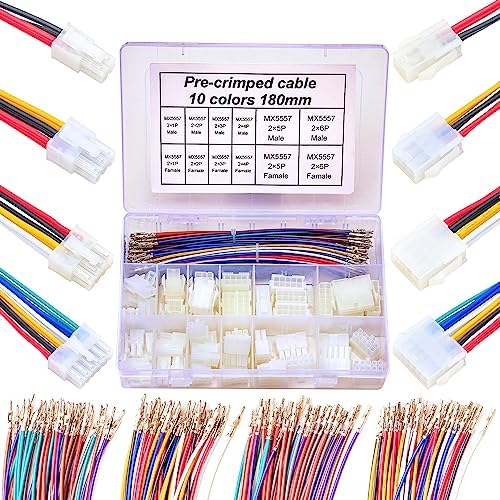
I hate trying to crimp Molex pins these days – they are too tiny for me to see easily, so I just keep a box of Molex prewired pins on hand with a bunch of random sized Molex connectors. So I just grabbed 3 wires, pushed them into a 20 pin connector, snipped off the other end, and temporarily crimped them to the appropriate RJ45 wire. (Later, for the permanent RV run, I will solder up a nicer splice.)

Next, I updated my Xantrex PRO completely. By that I mean all three updates – Main, Bluetooth remote, and the “Communication Interface”. Unless they are all running the latest firmware you will not have good results. These are all available from Xantrex. As an aside follow the instructions very carefully as its quite possible to brick your Xantrex if you really mangle this, like turning it off while its updating.
And finally make sure your Cerbo, Venus, or Raspberry Pi is likewise running the very latest version.
Then I:
- Created /data/xantrex-service
- Placed Scott’s program there
- Downloaded the Venus library per his instructions
- Started his program
And, amazingly it works! I now have the Xantrex reporting status (somewhat) accurately on my Cerbo.
As an aside, I always wanted the Cerbo remote display but find it impractical as it requires an HDMI cable and is expensive. Then I stumbled on to this beauty:
https://community.victronenergy.com/t/new-use-an-android-tablet-as-dedicated-gx-wi-fi-display-beta/8575
These instructions detail the procedure to turn a cheap Android tablet into a GX display, over local Wifi, so no wiring!
You might be wondering why bother to do this, as any device can be a GX display. But this puts a tablet in “Kiosk” mode and hardwires it as a display, so its always running and you won’t have to login periodically.
Now, back to my RV a while later, I mounted my new Cerbo (upside down, as that was all I had room for). Fitting as my inverter is likewise upside down.
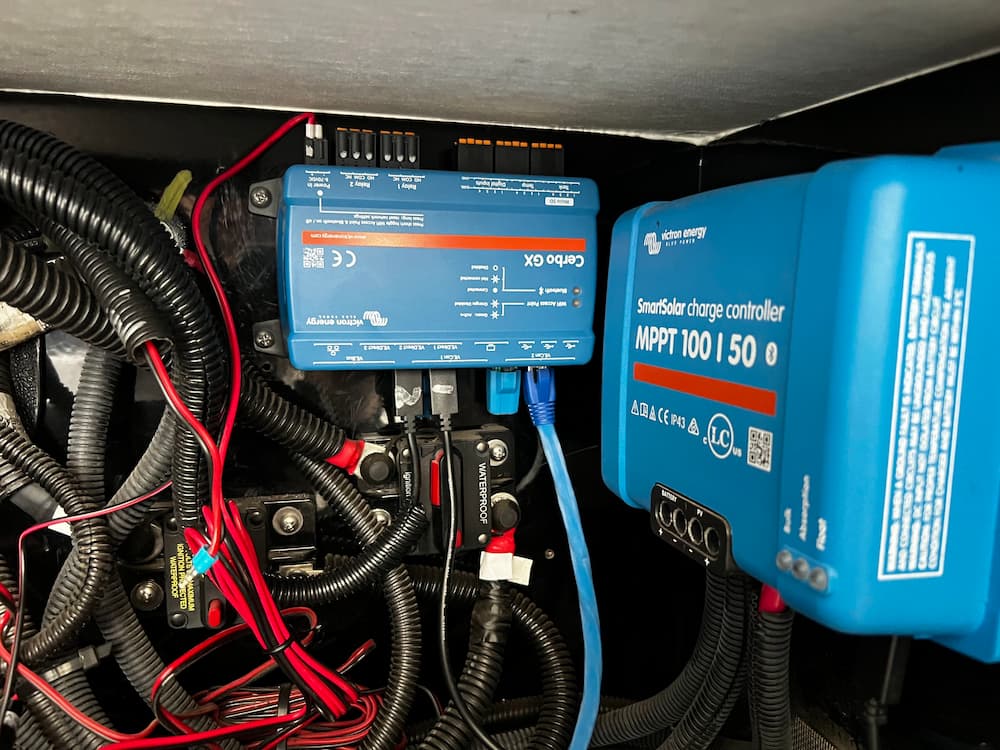
I made a custom RJ45 cable just because I had a roll of CAT6 and the tools laying around, and except for a few zip ties and some cleaning up of the wiring above, this is basically it. Plugged into the Xantrex and everything works as expected.
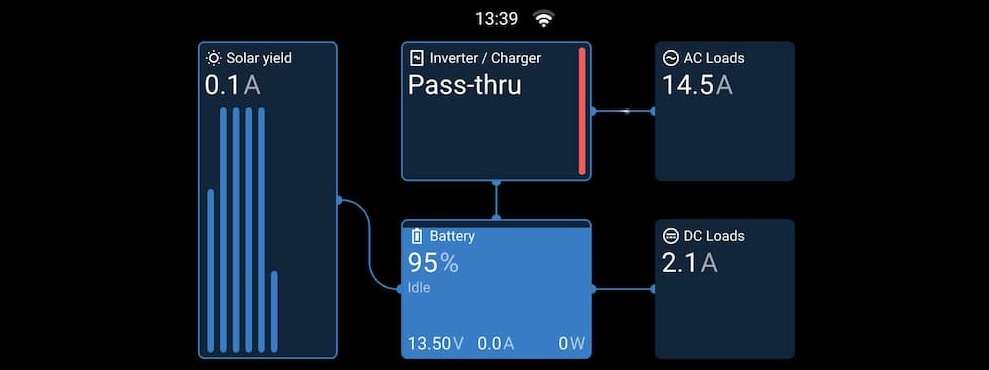
For the first time I can see the Inverter mode, and the AC load. Clicking on the Inverter gives some additional information but not a lot yet.
In the future I hope to continue tinkering with the program to allow me to remotely control the charge rate and float voltage, settings I change often, but for now this is a great little remote upgrade that lets me spy on the Inverter from anywhere in the world.
To permanently install Scott’s program and automatically restart, I created start.sh in /data/xantrex-monitor:
#!/bin/bash
cd /data/xantrex-monitor
nohup python3 xantrex-service.py –can vecan1 &
(Adjust can port for your installation) Make the script executable and link to auto-restart:
chmod +x start.sh
ln -s /data/xantrex-monitor start.sh /data/rc.local
After that whenever the Cerbo reboots the Xantrex service starts automatically. Here are a few parts I used for this installation including the Cerbo itself:
Links are Paid. Click on a link to see product at Amazon.



Leave a Reply